


You might have noticed that the screenshots you’ve taken on your Mac just get piled up on your desktop screen. This clutters your desktop and makes it look unorganized.

But, the good news is you can get rid of all those screenshots from your home screen without actually deleting them. You need to tweak a few simple settings and you’ll be done.
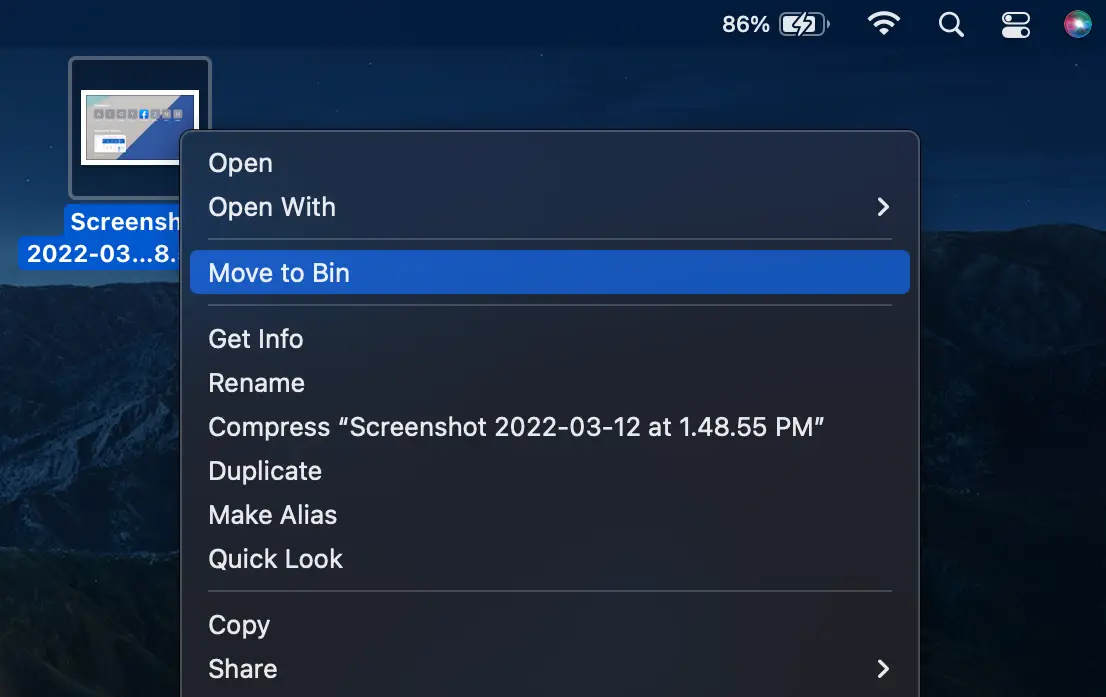
However, if you think you’ll not be needing the screenshots anymore, you can get rid of them completely from your mac. To do so, click the screenshot you want to delete, right-click or tap with your two fingers on the trackpad, then select Move to Bin.
Below is the step-by-step guide to remove screenshots from your desktop home screen without deleting them.
How to Get Rid Of Screenshots From Mac Desktop Home Screen
First of all, you need to create a new folder and copy all your screenshots from the desktop to that particular folder. Then, delete all the screenshots lying on your desktop screen.
Let’s understand this more clearly with visuals.
1. Go to Finder on your Mac.

2. Now, go to any folder like Documents or Downloads.

3. On an empty area, right-click or tap with your two fingers on the trackpad. Then, select New Folder as shown in the screenshot above.
4. Rename it as My Screenshots.

5. Now, go back to your desktop screen. Select all the screenshots and copy them.

Here’s how to select and copy them.
Copy a single screenshot: Click the screenshot, then press ⌘ (command key) + C.
OR
Right-click or tap with two fingers on the screenshot, then select Copy.
Copy all screenshots: On your desktop screen, press ⌘ (command) + A, then ⌘ + C.
OR
Press ⌘ (command) + A, hover the mouse pointer to any screenshot, right-click or tap with two fingers, then select Copy.
Copy multiple screenshots: Press and hold ⌘ (command), then click the screenshots you want to copy. Now, press ⌘ (command) + C.
OR
Press and hold ⌘ (command), then click the screenshots you want to copy. Now, hover the mouse pointer to any screenshot, right-click or tap with two fingers, then select Copy.
6. Go to the My Screenshots folder you’ve created earlier, then paste the copied screenshots [press ⌘ (command) + V].

You will now see all your screenshots appearing in the new folder.
Once you’re done, delete all the screenshots from your desktop.
Now, you might be wondering, do I need to do these every time I take a new screenshot? The answer is NO. You need to change the default location of the screenshots from the desktop to a new folder you’ve created earlier.
How to Make Your Screenshots Not Go to Desktop On Mac?
Here’s how to stop screenshots from saving to desktop on Mac.
1. Press shift + command + 5, then click Options.

2. A menu will then appear. At the top, you can see Save to Desktop is selected by default. You need to change the location to the one you have created before (My Screenshots).
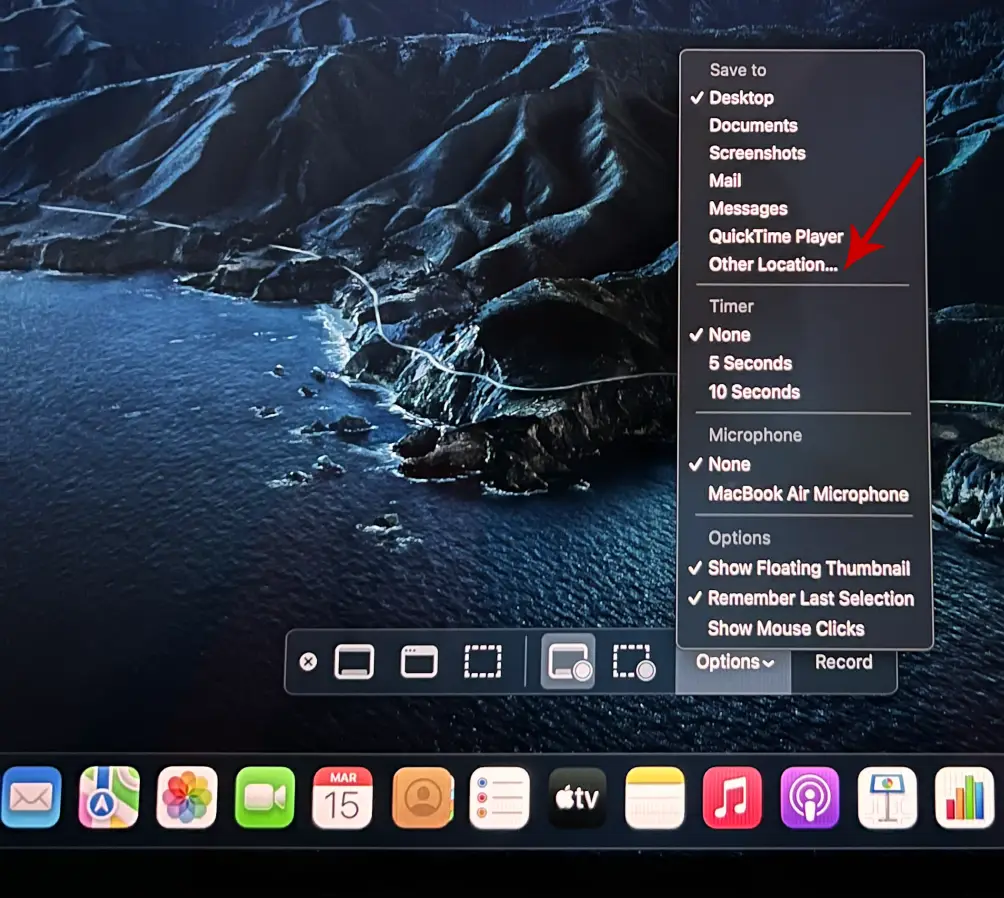
3. Select Other Location.
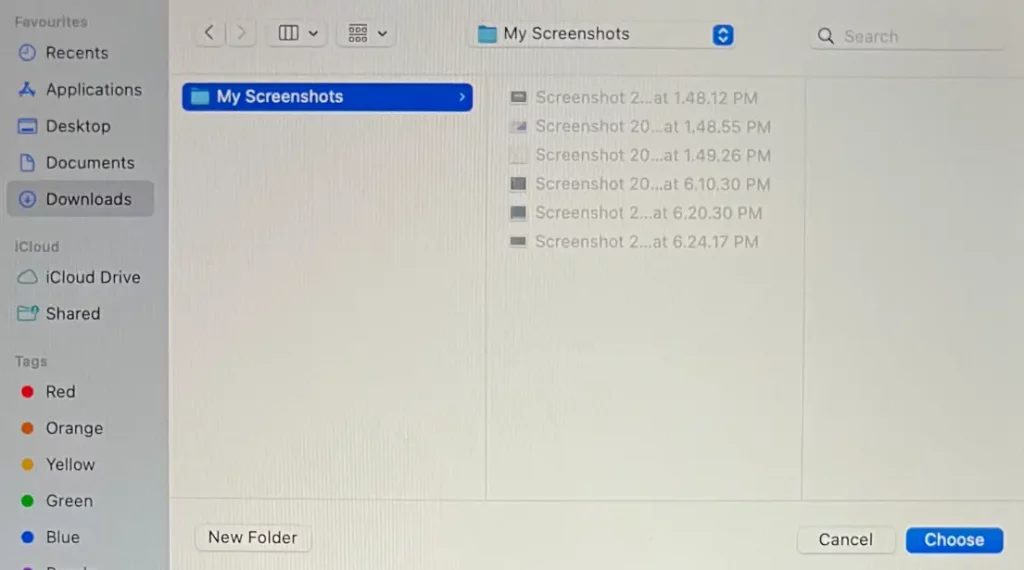
4. Go to Downloads, select My Screenshots, then click Choose.
That’s it! Any new screenshots you take on your Mac will now appear on your Screenshots folder and not on your desktop screen.


Leave a Reply